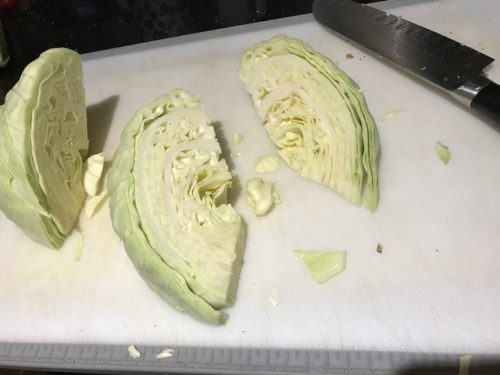
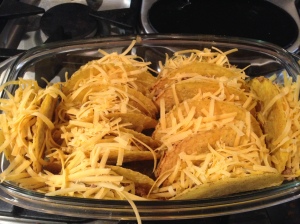
Category Archives: Other

Meatball Traybake

IMG_3096.JPG

This is another super simple, and cost conscious recipe adapted from The Sainsbury’s magazine.  I don’t know whether I have raved about this publication before but if I have I’m going to again.  If you are in the UK and you like food then I rate this magazine over all other offerings.  As the mag was originally launched by Delia all recipes are triple checked and I have NEVER found a fault with any of them.  In fact, it has been known for me to host a dinner party and make 3 completely new recipes straight out of the magazine! It hasn’t failed me yet!!!If you are outside of the UK – you can get a subscription… and it’s worth it in my humble opinion.

Anyway, back to the recipe.  This is a fabulous Rectangular Baker – one pot recipe ( and you know how much I love those!).  If you don’t have one of those you could use a Deep Covered Baker or even a Deep Dish Baker.  The ingredient list may seem a little longer than some of my normal recipes but most of them are things that I already have in the house – so I don’t feel it is heavy on the shopping list.

Ingredients

1.25kg potatoes
2 tbsp olive oil
1x 500g Carton Passata
1 Chicken Stock Cube or melt, dissolved in 200ml of boiling water
150g slightly stale Bread (the original recipe states white but I rarely eat white – so whatever you have in your house works)
150ml Milk
1 x 500g 20% fat Beef Mince
1 Egg beaten (medium is suggested but I only seem to buy large so…!)
1 small Onion, chopped finely with Food Chopper
2 Garlic Cloves, crushed
1 tsp Smoked paprika
1 Lemon
1/2 pack of cut coriander
100g Green Beans, top and tailed, cut in half

Method

  • Preheat the oven to 200C, Fan 180, Gas 6.  Wedge the potatoes, using the Veggie Wedger, and put into the Rectangular baker.  Add 1tbsp oil and toss the potatoes to coat them.  Add the passata and stock.  Stir.  Bake in the oven for 35-40 minutes.
  • Whilst the potatoes are baking, make the meatballs.  I use either my Food Chopper or Microplane grater to make the breadcrumbs.  If you want to make your food processor dirty then, by all means use that instead!  Add the breadcrumbs and milk to a Classic Batter Bowl (CBB).  Leave to soak for 5 minutes; add the beef, beaten egg, chopped onion, crushed garlic and paprika.  Use the Microplane Zester to zest the lemon and add to the CBB.  Pick the leaves from the coriander stalks, roughly chop them and keep to one side.  Finely chop the coriander stalks and add to the CBB.  Season the mix and get your hands in there!!  (I often ask one of my kids to help me to make these. This is their favourite activity – getting their hands well and truly involved in making tea!!)  Roll 28 or so walnut-sized meatballs and put on a plate.
  • Take the potatoes out.  Stir.  Add the meatballs.  Cook for another 20 minutes.
  • Blanch the green beans for 2-3 minutes, until just tender.  For me, that means popping into a Micro-Cooker with a tiny splash of water and giving them a 2 minute blast.  If you don’t have a Micro- Cooker, then just add the beans to boiling water for  the necessary time and then drain well.
  • When the meatballs have had their 20 minutes, add the green beans to the baker and bake for a further 10 minutes.  By this time the potatoes will be tender and the meatballs goldenand cooked through.
  • Drizzle over the remaining 1tbsp oil, scatter over the coriander leaves you kept from earlier.  Take the baker to the table and serve along with quarters of the lemon from earlier.


Leave a comment

Filed under Batter Bowl, Deep Covered Baker, Deep Dish Baker, Easy Cooking, Eggs, Family Cooking, Food Chopper, Garlic, Garlic Press, Microplane Grater, Other, Pepper, Potatoes, Rectangular Baker, Tea

Potato Salad

IMG_3187Following on from the success of sharing my coleslaw I thought I would share the other side salad which is a mainstay of our summers and BBQs!  This potato salad is absolutely divine warm but also fabulous cold which means it can easily be made ahead of the day.  It is also ridiculously easy – ANYONE can make this and feel proud of their own homemade brilliance!

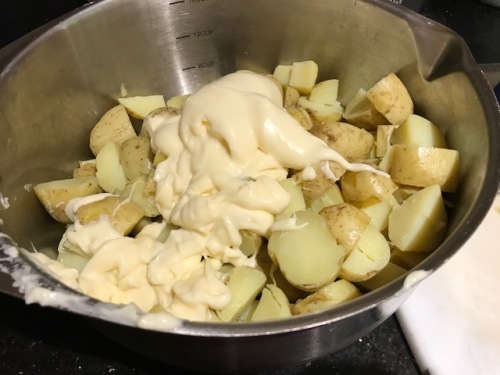
Now, as an ex-Pampered Chef consultant I use my Pampered Chef tools to make my life much easier but you can, obviously, manage without if you haven’t got a Micro Cooker!

Ingredients

Bag of Salad Potatoes – Charlotte or Jersey Royals are ideal.
Mayonnaise
Chives

Method

  1. Wash potatoes.
  2. Put bag of potatoes into Large Micro Cooker (I buy a 1kg bag), and put the lid on.  Cook in the Microwave on high for 10 minutes.  (If you don’t have a micro cooker, or even a microwave, then gently boil the potatoes on the hob until soft enough for a knife to be able to stab into them.IMG_3183
  3. Drain the potatoes and allow to cool.  If aiming to serve warm just cool until the potatoes stop steaming and are just warm.  If serving cold or later allow to cool completely.
  4. Chop the potatoes into smaller chunks.  How small you go is up to you.  IMG_3184
  5. Add large dollop of mayonnaise, be generous.IMG_3185
  6. Snip 2 or 3 ‘blades’ of chives into small pieces into the bowl.  IMG_3186
  7. Mix well. Enjoy!

Leave a comment

Filed under Batter Bowl, Easy Cooking, Eggs, Family Cooking, Other, Potatoes, Quick Cooking, Super Quick cooking!, Vegetarian

Coleslaw – Susie Style!

IMG_3196

Finally, summer has decided to reappear here in Sheffield and along with the summer comes the desire to eat salads.  A few years ago my good friend Anne Brand said to me “once you have made your own coleslaw you will never buy one from the shops again”.  At the time I thought she was mad as we love a good coleslaw but Oh My she is soooo right!!!  I have taken the recipe she suggested and merged it with a Nigella one and this is the result.  The recipe is blindingly simple but this year I have had so many people ask for the recipe I decided to share on here.

Ingredients – (to serve 4/5 with left overs)

White Cabbage – half
Carrot(s) –  one large one or a couple of smaller ones.
Onion – 1.  (I usually prefer red for the visual effect, spring onions are fine, even plain white onions are OK if it is all that you have)
Mayonnaise
Salad Cream
Sultanas (optional)

Method

You will notice that all the ingredient amounts are all a bit vague.  (I understand if this frustrates you – I would much prefer to have specific amounts but this recipe really does need you to decide what you prefer!

  1. Shred/ Slice the cabbage, best done using a big and sharp knife.  Cut the cabbage into quarters and then cut the core out from each quarter.  Finely slice.  f you don’t like long slices of cabbage then keep rotating the cabbage and slicing from different  angles.IMG_3189IMG_3190
  2. Use a vegetable peeler to “peel” and entire carrot or 2.  Keep turning the carrot in your hand to get even slices.  Again, if you don’t like long strands in your coleslaw peel the top half first and then turn it around and do the other end.IMG_3191
  3. If using an onion, top and tail, quarter and finely slice. If using spring onions you obviously don’t need to quarter them.  IMG_3192
  4. If adding sultanas add a handful.IMG_3193
  5. Mix well.  Personally, at this point I use my hands (quicker and easier!)IMG_3194
  6. Add a good splodge of mayo and a good splodge of salad cream – about the same size.  Do not be sparing, you will almost certainly need more than you think you do!
  7. Add a good teaspoon of mustard.IMG_3195
  8. Mix well until all strands of the vegetables are covered with the sauce.
  9. Taste. You are looking for creamy, moreish, slightly tangy taste.
  10. More than likely you will need to add more mayo/ and or salad cream.
  11. Repeat 9 & 10 until you are happy.
  12. Serve!

Leave a comment

Filed under Batter Bowl, Easy Cooking, Family Cooking, Other, Quick Cooking, Super Quick cooking!, Vegetarian

Jam and Coconut Loaf Cake (adapted from Good Housekeeping Magazine)

The other day it was my husband’s birthday so he (obviously!) needed a cake!  Usually I would do him a chocolate cake because, well I don’t need to explain do I?!! This year however, I remembered a recipe which I had seen in the Good Housekeeping magazine which I had showed him and he said “what are you waiting for, just get on with it then!!” My memory says this was near midnight just before going to bed – so, unsurprisingly, I didn’t ‘just get on with it’.  In fact several months have passed and I still haven’t made it.  So, for his birthday I tried it.  It was a ROARING success.  It isn’t a classic cake with icing and decoration but I like to think he loved it as a birthday cake nonetheless.  I will, however, NOT be keeping it just for birthdays… it is far too yummy!  So, without further ado and any more waffling, here is the recipe!

IMG_2596Ingredients

200g (7oz) soft unsalted butter
200g (7oz) caster sugar
4 medium eggs, beaten
2tsp vanilla extract
200g (70z) self-raising flour
1/2 tsp baking powder
225g of your favourite jam (the recipe said seedless, mine wasn’t, it was fine!)
2tbsp desiccated coconut

Method

  1. Preheat oven to 180C/ 160C fan/ Gas Mark 4.  Lightly grease Stoneware Loaf Pan (2lb loaf tin).  If you don’t have stoneware then line the tin as well.
  2. Beat the sugar and butter together with an electric mixer (handheld electric is also fine, you can obviously do this by hand but you will need biceps of steel and it’s more than I am prepared to do!).  Do this for way longer than you would think – 5 minutes was recommended…(I just did a long time!) until the mix changes to a much lighter colour and is really fluffy.
  3. While the mixer is still going gradually add the eggs and the vanilla extract.
  4. Fold (or turn down the mixer to its slowest setting!) in the flour, baking powder and 2tbsp of warm water until just combined.
  5. Pour into tin and bake for 55min-1hr 5mins until golden, risen and a cake tester comes out clean.
  6. Allow to sit in the stoneware pan for 5 minutes or allow to cool entirely if using a metal tin, then remove from the tin.
  7. In a small pan heat the jam over a low heat stirring with a Mix ‘N Scraper until smooth.  Spread evenly over the top.  When I first started I thought I had way too much jam to fit on the cake but I just kept gently pouring and it magically stayed on!  Sprinkle with the coconut.
  8. Serve – with a good old cup of tea.

Leave a comment

Filed under Other

Creme Egg Cheesecake

Oh my days… I have just found this recipe waiting to be shared… why have i never shared this with you?  Anyway, as Easter is just around the corner I thought you might like it!

CREME EGG CHEESECAKECheesecake

INGREDIENTS

  • 280g Digestive Chocolate Biscuits
  • 140g Butter (Unsalted), melted
  • 560ml Double cream, lightly whipped until it forms soft peaks
  • 140g Icing Sugar, sifted
  • 2 x 280g Tubs of Philadelphia Cream Cheese (Full fat)
  • Juice of half a lemon
  • 275g Mini Cadbury’s Creme Eggs (about 3 small bags)
  • 3 or 4 Full size Creme Eggs to decorate
  • 60g Milk Chocolate
  • 120g White Chocolate
  • Yellow Food Colouring (see notes below)

INSTRUCTIONS

  1. Crush the biscuits until they look like lumpy sand. (You can use Manual Food Processor or Food Chopper for this)
  2. Mix with the melted butter and press into your 7″ tin.
  3. Unwrap the mini Creme Eggs and chop them each into quarters.
  4. Combine the whipped cream, icing sugar, cream cheese, lemon juice and chopped mini Creme Eggs. Fold in gently until fully combined.
  5. Smooth on top of the biscuit base and flatten the top with the back of a spoon or a palette knife.
  6. Chill for 3 hours or, even better, over night.
  7. Use the knife tip (below) to remove the cheesecake from the tin.
  8. Melt your milk chocolate in the Double Boiler over a pan of boiling water and allow to cool very slightly before drizzling over the cake in zigzags.
  9. Melt your white chocolate in the same way, drizzle half of it onto the cheesecake.
  10. Colour the white chocolate that is left with a tiny amount of food colour. Add more until you reach a yellow you’re happy with, then drizzle this over too.
  11. (You can prep all of the chocolates, pop them into piping bags and drizzle alternately if you prefer.)
  12. Cut your large Creme Eggs in half and use to decorate the top of the cheesecake

Some tips:

  • Pop the Cadbury’s Creme Eggs in the fridge for an hour or so before cutting, it will make them less gooey.
  • When whipping the cream, be sure to watch it very carefully. It should be just forming soft floppy peaks, but still hold it’s shape. Too runny and the cheesecake will be sloppy, too stiff and it will be too dense.
  • Do sift the icing sugar, it will give a much smoother texture to the cheesecake.
  • I would stick to Philadelphia creme cheese for this (and full fat) it seems more stable than supermarket own brands.
  • Add more lemon juice if you’d prefer a slightly sharper tang.
  • This is the gel food colour used to colour the chocolate: Sugarflair Paste Colour – Egg Yellow
  • Only ever use Gel Food Colour to colour the chocolate. Liquid food colour will make it too thin.
  • Allow the chocolate to cool slightly before drizzling to avoid ‘melting’ the cheesecake. You’ll also get neater lines as slightly cooled chocolate doesn’t spread so easily.
  • For a neater chocolate drizzle, use disposable piping bags for each colour of chocolate. Just snip the end off to pipe.
  • Use a tin with either a springform (the type where the side unclips) or a removable base.
  • Warm a sharp, thin knife under a hot tap and then dry it. Use this to run around the outside of the cake, inside the tin, before removing. Remove the knife and wipe it as you work your way around the cake.
  • The recipe is for a 7″ tin. You can use smaller or larger but your cheesecake will obviously be taller or shorter

Leave a comment

Filed under Other

Carbonara Recipe – that works every time!

It has been such a long time since I added any recipes to my blog but there are still recipes which I still want to share.  I have favourite recipes which are on scraps of paper which are getting more and more ragged as I use them!  So, today I have finally got back here and am sharing with you all again.

FullSizeRenderPasta Carbonara is a recipe which my whole family loves so over the years I have tried many recipes with varying degrees of success.  Sometimes it would be flavourless, sometimes there wouldn’t be enough sauce, occasionally it was that glorious creamy sauce that coated each strand of spaghetti (our favourite form of pasta for carbonara).  Then one day my daughter had to make Carbonara at school for Food Technology at school and she brought home this recipe.  I would love to name check the parent who shared this with us but Meg has never managed to find out who it was.  Soooooo if you are reading this, live in Sheffield and had a daughter who went to Silverdale secondary school and you recognise this recipe please shout up.  In the meantime many many thanks for a brilliant recipe!!  For those purists out there – I know that this isn’t how you make a classic Carbonara BUT it works… EVERY time… and we all love it!

Ingredients

Pasta for 4/5 people (for us that means 500g spaghetti packet and I always use wholewheat pasta.  Its a really easy switch that taste no different but is so much healthier)
Olive Oil
Six slices of back bacon or 12 of streaky bacon (the better quality you can afford the better and if you can go all the way to pancetta then please do)
2 Cloves of Garlic
250ml Cream (the original recipe says double but I usually have single so use that, and our pots are 284ml so I use a whole one – who needs 34 ml of cream hanging about in the fridge?!)
Freshly Ground Black Pepper
Dried Oregano
Dried Thyme
Parmesan Cheese Grated – good chunk at least 75g.
Frozen Peas/ Frozen Sweetcorn (optional)

Method

  1. First get a big pan of salted water on to boil (I use Nigella’s rule – enough salt to make it taste like the Mediterranean!).
  2. Whilst the water coming to the boil cut the bacon into small strips/ squares.
  3. Add your pasta to the boiling water and give it a quick stir with a fork to make sure it doesn’t all end up in one lump stuck together.
  4. Add some olive oil to a large sauté pan (I LOVE my non-stick Pampered Chef one for this so I only use a small amount of oil, maybe tsp).  Once the oil is warm add the bacon.
  5. Fry the bacon until it starts turning colour.  At this point add your garlic.  Sometimes I crush the garlic, sometimes I thinly slice it – depends on my mood and the tool I have nearest to hand!  Make sure the pan is not so hot that the garlic burns.  Season with plenty of pepper.  Do not add any salt – you will have enough from the bacon and cheese.
  6.  Once the bacon is cooked and nicely brown add a good pinch of both herbs.  Stir these in and cook for a minute or two, then add your cream.  Do not boil the cream just let it get up to a good simmer.
  7. By now the pasta should be cooked.  Drain the pasta – I like to leave just a little bit of the water with the spaghetti and toss it about at this point to help reduce clumping.
  8. Add the pasta to the sauce (my saute pan is big enough I add the pasta into that – if yours isn’t go the other way!), add plenty of grated cheese and mix well.  Sometimes I also add some frozen peas and/ or sweetcorn at this point.  This is just to increase the vegetable quota in the kids diet!  Taste to check whether you have enough cheese and enough seasoning.
  9. Serve.

2 Comments

Filed under Easy Cooking, Family Cooking, Other

Pampered Chef Rockcrok Pineapple Upside-down Cake

Oh my goodness, it has been sooo long since I posted a new recipe?!!  Where has that time flown?  Well, I am pleased to say that I return today with TWO new recipes.  Both of which I didn’t expect much from, but both of which surpassed all expectations! This first recipe is a 70’s throwback recipe for Pineapple Upside-Down Cake – made in the microwave!!  My first thought was that it was going to taste too spongy or ‘fake’ but I was blown away with how light, fluffy and moist it was.  I don’t know how much of this is to do with the Pampered Chef Rockcrok, but I love it – and will be making it again!

Pineapple Upside-Down Cake - made in the microwave?!

Pineapple Upside-Down Cake – made in the microwave?!

Topping

50 g butter
50 g light soft brown sugar
7 canned pineapple slices
7 cocktail maraschino flavor cherries

Cake 

175 g self-raising flour
4 tsp baking powder
175 g golden caster sugar
100 g butter
100 ml semi-skimmed milk
2 eggs

  1. Melt the butter in Rockcrok Everyday Pan over a medium heat until melted (approx. 1 – 2 minutes). Add brown sugar and cook until sugar is dissolved and bubbling, stirring continuously with Small Mix ‘N Scraper. Remove from heat.
  2. Open Pineapple tin using Smooth Edge Can Opener. Using Stainless Colander drain pineapple. Arrange pineapple slices in a single layer in base of Rockcrok. Place a cherry in centre of each pineapple slice.
  3. Using Easy Read Measuring Cup measure 100ml of milk. Put butter in 500ml Prep Bowl and melt in the microwave (about 30-40 seconds). Remove from microwave to cool slightly.
  4. Place flour, baking powder and caster sugar in Classic Batter Bowl; using Bamboo Spoon mix well.
  5. In Small Batter Bowl, whisk melted butter, milk and eggs together until well combined using Stainless Whisk.
  6. Pour egg mixture into the flour mixture; then whisk together until well combined and smooth. Slowly pour cake batter over pineapple. Microwave, covered, on HIGH 9 – 10 minutes or until a wooden cocktail stick or cake tester comes out clean when inserted into centre of cake.
  7. Remove pan from microwave. Run Skinny Scraper around cake edges to loosen. Immediately invert cake onto Shimmering Glass Round Platter. Serve warm.

Serves 7

Leave a comment

Filed under Batter Bowl, Cake, Cherries, Easy Cooking, Eggs, Family Cooking, Food Chopper, Other, Pineapple, RockCrok

The Pampered Chef ® Spicy Turkey Tacos Recipe

photo-3

The finished Tacos – Yum!

These are from the brand new Pampered Chef Season’s best recipe collection.  They really are easy to make and they were gobbled up by the whole family (including my spice averse son!).  My only error (I make the mistakes so you don’t have to!) was to not let the mince cook until nearly dry.  My mince still had some juice left (see the picture below) which I then proceeded to spoon into the tacos.  This made some of them go soggy on the bottom (and who needs a soggy bottom really?!) and the taco didn’t stay in tact which made for slightly tricky eating… we managed though!!!
Ingredients

Tacos
12 crunchy taco shells
75 g medium Cheddar cheese (use straight from refrigerator)
1 onion, quartered
1/2 tablespoon sunflower oil
500 g turkey breast mince
1 packet (30 g – 35 g) taco seasoning mix
100 ml cold water

Toppings
6 tomatoes, deseeded and coarsely chopped (optional)
300 ml soured cream (optional)
15 g fresh coriander, coarsely chopped (optional)

Method

  • Preheat oven to temperature directed on taco shell packet. Separate taco shells and arrange, open-end down, overlapping slightly in lid of Covered Roaster; set aside.photo 1
  • Grate cheese usingMicroplane® Adjustable Coarse Grater; set aside. Finely chop onion with Food Chopper on Cutting Board.
  • Add oil to metal pan of Covered Roaster; heat over medium heat 1 – 2 minutes or until hot. Add turkey; cook 4 – 6 minutes or until no longer pink, breaking into small pieces using Mix ‘N Chop. Meanwhile, bake taco shells in preheated oven as directed on packet.photo 2
  • Add onion, taco seasoning mix and water to turkey; cook 2 minutes or until simmering, stirring occasionally using Bamboo Spatula.
    Breaking up the mince with a Mix 'N Chop

    Breaking up the mince with a Mix ‘N Chop

    Remove tacos from oven. Set oven to 200°C/fan oven 180°C/Gas 4. Fill each taco shell using Mini Mix ‘N Scraper®, dividing evenly.photo 4

  • Top each taco shell with grated cheese; place tacos in lid and return to oven. Bake 4 – 5 minutes or until filling is hot and cheese just begins to melt.

    Tacos ready for the oven

    Tacos ready for the oven

  • Remove lid from oven. Serve tacos immediately accompanied by toppings in Bamboo Small Snack Bowls, if desired.

Yield: 12

Per serving: Nutrition information per taco: Energy 730kJ/174kcal, Protein 14.7g, Carbohydrate 8.8g, Sugars 0.9g, Fat 9.1g, Saturated fat 2.4g, Fibre 0.6g, Salt 0.6g

Cook’s Tip: This recipe serves 4 – 6 as a main course with a green salad, or serves 12 as part of Mexican party buffet.
Guacamole can be substituted for the soured cream topping and tomato salsa for chopped tomatoes, if desired.
For a variation, add 1 can (400 g) red kidney beans in water, rinsed and drained, together with the onion in step 4.

© 2014 The Pampered Chef used under license.

Leave a comment

Filed under Cheese, Easy Cooking, Family Cooking, Food Chopper, Microplane Grater, Other, Quick Cooking, Super Quick cooking!, Tea

Pampered Chef Strawberry Amaretti Pastries

I made these again last night…. I had forgotten just how delicious they were. These make me think that summer must be on its way! Enjoy!

Susie's Recipes

Strawberry Amaretto Pastry... YUM!!! Strawberry Amaretto Pastry… YUM!!!

This recipe is just a fantastic taste of Summer.  Strawberries, Cream, puff pastry… yum!!!  Next time I make them I WILL take a photo and not just wolf it down!

Ingredients

1 Packet (375g) chilled fresh ready-rolled puff pastry (1 Sheet)
60g flaked almonds, divided
3 tbsp granulated sugar
1 orange
1 carton (284ml) double cream
85g sifted icing sugar, divided
115g mascarpone cheese, softened
12 large ripe strawberries, sliced
1 tsp almond extract

Method

  1. Preheat oven to 200˚C/fan 180˚C/ Gas 6.  Unroll pastry sheet onto Rectangle Stone.  Trim pastry edges to make rectangle measuring 30 x 23 cm; discard trimmings.  Finely chop 40g of the almonds using Food Chopper.  Combine chopped almonds and 2 tbsp of the granulated sugar; sprinkle evenly over surface of dough.  Lightly press almond mixture into dough using Bakers Roller.
  2. Using Pizza Cutter, cut dough lengthways into three…

View original post 237 more words

Leave a comment

Filed under Other

Deborah Bohl’s Sweet & Sour Chicken

Chuck & Bung Sweet & Sour.... Yum!!

Chuck & Bung Sweet & Sour…. Yum!!

I have been given a new “Chuck and Bung” recipe by my Pampered Chef colleague Deborah and its a corker!!  This is the easiest sweet and sour recipe I have ever tried and it tastes fabulous.  Deborah did suggest that you can double the sauce ingredients (ketchup, vinegar & sugar) but on my first go yesterday I just made it as the recipe suggest.  Next time I think I shall try the double sauce approach (sorry Deborah for not listening!!)

Ingredients

• 9 tbsp tomato ketchup
• 3 tbsp malt vinegar
• 4 tbsp dark muscovado sugar or other brown sugar
• 2 garlic cloves , crushed
• 4 skinless and boneless chicken breasts, cut into chunks
• 1 small onion , roughly chopped
• 2 red peppers , seeded and cut into chunks
• 227g 8 oz can pineapples pieces in juice, drained
• 100g sugar snap peas , roughly sliced
• handful salted, roasted cashew nuts, optional

Method

Use the Measure All Cup to measure the ketchup and the vinegar, tip into Classic Batter Bowl.

Add the dark brown sugar, using the Adjustable Measuring Spoons.

Use the Garlic Press to add the garlic to the Batter Bowl

Use Forged Cutlery Utility Knife to chop the chicken and add to the mix.

Throw in any chopped veg as desired!  Mix well with Small Mix ‘N Scraper.

Chuck everything into the Rectangular Baker and bung in the oven at 180 for about 35-40 minutes.

Serve with rice! Delicious!!


Options:  change the veg above for baby corn, mushrooms & peppers and leave out the pineapple. Susie

Susie Evans
Independent Sales Director for The Pampered Chef
07854 241575
http://www.pamperedchef.biz/susieevans
http://www.facebook.com/Susie.PChef


Sweet & Sour Ready for the oven.


Leave a comment

Filed under Batter Bowl, Chicken, Deep Covered Baker, Easy Cooking, Family Cooking, Garlic, Garlic Press, Mushrooms, Other, Pepper, Rice, Rice Cooker, Square Baker, Stoneware, Tomato